1) It's a version from:
http://www.ubuntuvibes.com/2012/04/things-to-do-after-installing-ubuntu.html
Ubuntu 12.04 final has been released. Check out our post installation guide for Precise.
Ubuntu 12.04 installer allows you to install updates and refresh repositories from installer itself, if you are connected to the Internet. If you skip this part, later you should update your system and repositories. To do that, just launch update manager from dash menu. If you want to have faster updates, select a server near you or start the test which will automatically set a best server for you.
Go to additional drivers and install new drivers as required.
Install Ubuntu Restricted Extras from Ubuntu Software Center to add support for flash, java and mp3 playback. If you already installed updates and third party software during installation, you can skip this step.
Add support for encrypted DVD by running following commands:
sudo apt-get install libdvdread4sudo /usr/share/doc/libdvdread4/install-css.sh
If you want to add support for Systray or Notification Area which has been disabled in Unity, install and launch dconf-editor from Ubuntu Software Center. Now to enable it just add an extra string 'all' under Desktop > Unity > Panel as shown in screenshot below (requires a logout to work). To revert, just click on 'Set to Default'.
Install your favorite indicators. A list of indicators with installation instructions can be found on
Ask Ubuntu and
here.
Though Ubuntu 12.04 comes with quicklists for most of the apps, you can add custom quicklists support to your favorite apps. Many quicklists and their installation instructions can be found
here.
Change Unity launcher behavior and control what shows in dash by going to privacy settings in system settings.
In case you are only able to access Unity 2D, run the command below to check if your system supports Unity 3D.
/usr/lib/nux/unity_support_test -p
Medibuntu (Multimedia, Entertainment & Distractions In Ubuntu) is a repository of packages that cannot be included into the Ubuntu distribution for legal reasons (copyright, license, patent, etc). You can add Medibuntu repository by running commands below:
sudo -E wget --output-document=/etc/apt/sources.list.d/medibuntu.list http://www.medibuntu.org/sources.list.d/$(lsb_release -cs).list && sudo apt-get --quiet update && sudo apt-get --yes --quiet --allow-unauthenticated install medibuntu-keyring && sudo apt-get --quiet update
sudo apt-get install app-install-data-medibuntu apport-hooks-medibuntu
You can install new Gnome 3.4 apps in Ubuntu without installing Gnome Shell by running command below. These applications lack proper Unity Integration though.
sudo apt-get install epiphany-browser gnome-documents gnome-contacts
To install latest Gnome Shell 3.4, run the command:
sudo apt-get install gnome-shell
Not all gnome 3.4 components have been updated in Precise. Run the commands below to fully update all your Gnome 3.4 components. Beware that these packages may break your system.
sudo add-apt-repository ppa:ricotz/testing
sudo add-apt-repository ppa:gnome3-team/gnome3
sudo apt-get update && sudo apt-get upgrade
To install classic two panel Gnome session, run the command:
sudo apt-get install gnome-session-fallback
If you want to try new Linux Mint Cinnamon interface, run the commands below:
sudo add-apt-repository ppa:gwendal-lebihan-dev/cinnamon-stable
sudo apt-get update
sudo apt-get install cinnamon
2) It`s a version from:
http://blog.sudobits.com/2011/09/08/10-things-to-do-after-installing-ubuntu-11-10/
plus news instructions.
Ubuntu 11.10 – Oneiric Ocelot beta 1 is out now! Now it’s the time to
install some necessary applications/packages to make the system useful
for any common purpose such as Listening music, watching movies, playing
videos over the web etc. or any specific purposes (e.g if you’re a web
designer then you need to install some cool fonts, image editors,
graphics designing tools etc).
Since
Ubuntu 11.10
has already made some good changes in the selection of default
applications (as compare to previous versions), but still a lot of
efforts are required to customize the Ubuntu for your needs. Here is
list of top 10 customization tips that I think is required for most of
the users, feel free to add one if you feel it’s useful for Ubuntu
users, through comments. Some of the packages are mandatory while some
are recommended based on its popularity – if you don’t like any Apps,
just swap it out with your favorite one.
Things to do after a fresh installation of Ubuntu 11.10 (Oneiric Ocelot)
1. Update Ubuntu (Repository cache)
After installing Ubuntu 11.10, first of all, update the package
information (you are always recommended to update your computer as
frequently as possible but surely before installing any new programs so
that you will get the latest one available in the repository). You can
update your system either from command line
Open a terminal (Ctrl + Alt + t) and execute the following commands -
sudo apt-get update
sudo apt-get upgrade
Alternate way – start update manager (it’s installed by default, just search for it) and click on install updates.
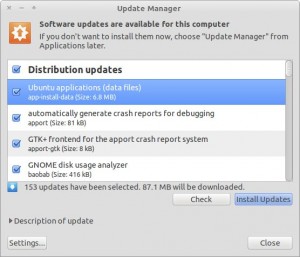
updating repository using Update Manager
2. Install ‘Ubuntu Restricted Extras’ – codecs/plugins
You need to install the audio mp3 (MPEG Layer 3) decoders as it’s required for playing your mp3 songs), similarly you need to
install Adobe flash player on Ubuntu 11.10
for playing flash content such as YouTube Videos (although they are
trying to replace the flash dependencies with HTML 5). You can install
all these proprietary plugins/codecs by installing the package called
‘ubuntu restricted extras’. Open a terminal and execute the command -
sudo apt-get install ubuntu-restricted-extras
Restricted library/packages for playing encrypted DVD’s
Although you’ve installed ‘ubuntu-restricted-extra’, you still won’t
be able to play any proprietary DVD (which is usually encrypted with
CSS(Content Scramble System) ). Therefore You also need to install
libdvdcss2, a free software library for unscrambling/accessing those
DVDs. Open terminal and execute the following commands (You may need to
reboot) -
sudo apt-get install libdvdread4
sudo /usr/share/doc/libdvdread4/install-css.sh
3. Install Additional (graphics card and webcam) drivers
If you are using any
graphics/video card (which is
recommended for 3D effects in Unity or Gnome-shell, if your computer
doesn’t fulfill the graphics requirement then you will be 2D version of
Unity, in fallback mode). In most of the cases, Ubuntu will
automatically detect and tell you there any additional hardware drivers
are necessary or not, you just need to select the appropriate driver and
click on Activate.
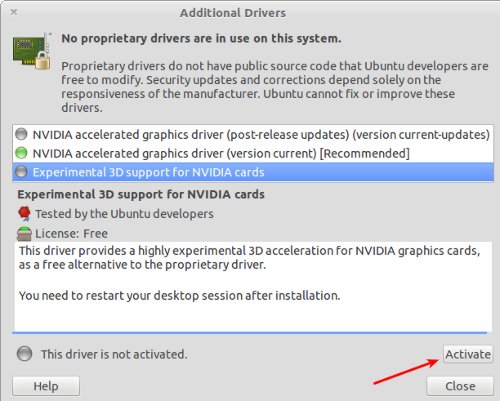
For any reason if your graphics card (probably NVIDIA or ATI) doesn’t get detected automatically then don’t be panic. Go to
System Settings -> Additional Drivers and wait for the window to appear with driver options. Select the driver software you want to install and click on
Activate. After installing the driver – restart your computer. That set.
In case of the AMD-Radeon graphic card driver hasn't been installed, download the specific driver on AMD site. Go to
http://support.amd.com/us/gpudownload/Pages/index.aspx
and select your specific driver following the 5 steps and download the file in /home/
user/Downloads, where
user is your user name.
It will be downloaded a file like this
amd-driver-installer-12-2-x86.x86_64.run
open a terminal (alt+ctlr+t) and type this commands:
cd /home/user/Downloads
chmod +x amd-driver-installer-12-2-x86.x86_64.run
./amd-driver-installer-12-2-x86.x86_64.run
and follow the instructions of the program installation driver.
install cheese – webcam software/driver for your webcam
If you want to use your webcam for taking pictures or recording
videos then you must need a webcam software. Cheese is the most popular
webcam software, and it’s already there in Ubuntu Software Center, or
install it from terminal -
sudo apt-get install cheese
4. Browsers: Update Firefox and install Chromium or Chrome
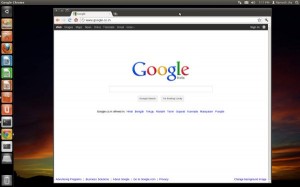
Chromium - Browsing with Speed
Firefox is the default web browser in Ubuntu 11.10, which is fast, safe and stable even there are multiple tabs and add-on’s installed. To update it follow this commands:
open the console, just clicking alt+ctrl+t
type the followings commands:
sudo add-apt-repository ppa:ubuntu-mozilla-security/ppa
sudo apt-get update
sudo apt-get install firefox
For closing the console type 'exit'.
On the
other hand, Chromium browser is similar to Chrome browser, but it's
is maintained by the freee software community by GPL license. It’s popularity is increasing
exponentially
but still does not allow open files before downloading and t
here are not many applications available. So it’s a must have application on Ubuntu (or any other
OS). Chromium supports all the extensions/themes that you use on Chrome.
It’s one of the most popular software in Ubuntu Software Center. So you
can install it in a single click from Ubuntu Software Center, or just
type the command in terminal (Ctrl+Alt+T ) :
sudo apt-get install chromium-browser
You should install some codecs like ffmpeg for playing multimedia contents on web.
sudo apt-get install chromium-codecs-ffmpeg-extra
Installing/updating firefox
5. Install VLC Player
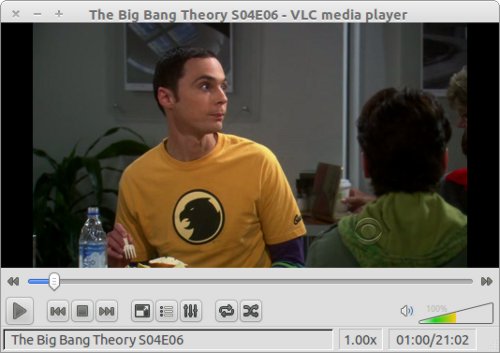
VLC player is one of the most popular open source media player. It is commonly called as – ‘
all in one‘
media player, it has lot of features that you expect from a modern
media player. On Ubuntu 11.10 – it’s a must have application – for video
player it’s probably the best one. VLC player is capable of playing a
wide range media formats such as mp3, avi, mp4, flv etc. Since it’s
available in Ubuntu Software Center – you can either install it from
there or type the command -
sudo apt-get install vlc
6. Install any Image editing program
An image editing/creating software is necessary for every one, by
default no such program is installed. So you’re recommended to install
an image editor.
GIMP is the most popular open source and free image
editor, having features similar to Adobe Photoshop. GIMP has a lot of
powerful features which allows you to create complex graphics
designs/images. it is more suitable for intermediate users – those
having some experience in image editing. To install gimp – either search
in Ubuntu Software Center or install it from terminal -
sudo apt-get install gimp
For some extra set of brushes, gradients and plugins etc execute :
sudo apt-get install gimp-data-extras
sudo apt-get install gimp-plugin-registry
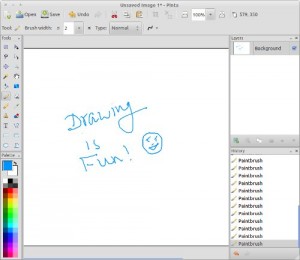 Pinta
Pinta is a good image editing program – with some
basic features. it’s very easy to use, so most suitable for absolute
beginners. it looks very similar to MS paint program. To install pinta –
use Ubuntu Software Center or execute the command
sudo apt-get install pinta
7. Try Gnome shell
Ubuntu 11.10 uses Unity as the default UI/window manager but it’s
based on Gnome 3 so you can install Gnome shell simultaneously (without
breaking the Unity desktop, which used to happen in previous version of
Ubuntu i.e in 11.04). Gnome shell has been developed from scratch for a
totally new experience. The interaction and navigation has been evolved
in Gnome shell – so it appears to be the next generation desktop. The
Gnome shell is already there, in the official repository of Ubuntu 11.10
– so you can install Gnome 3 in one simple command (or from USC)
sudo apt-get install gnome-shell
If you’ve any problem in using Gnome shell – then refer to my previous post about
installing Gnome shell on Ubuntu 11.10 , where a little bit of extra information is there along with step wise installation instructions.
8. setup an online file backup program
You must keep an an online backup of your important files. Now a
days- cloud backup is recommended. Ubuntu 11.10 has ‘Ubuntu One’
installed by default, in which you will get 2GB free storage and you can
access (direct music streaming is also available) your files from
anywhere. Most of the backup programs such as Dropbox offers sync
features – which can also be used in collaborative projects.
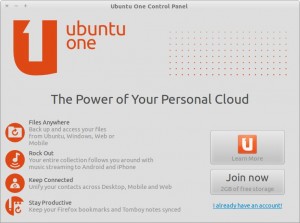
Ubuntu One - backup with Cloud
Ubuntu One
it’s already installed in Ubuntu 11.10. You will get 2GB of free
storage (in cloud). So you can easily synchronize your critical files
using this application. Click on the Ubuntu One launcher in the panel
and follow the instructions. Files can accessed from anywhere – and
music streaming is also available on Android and iPhone.
Dropbox
File Sharing is Fun!
Dropbox is one of the most popular file sharing (as well as backup)
program. Dropbox offers 2GB storage for free. You must have a dropbox
account to start, if you don’t have then
create an account
first. Sync feature of dropbox is great! which makes it well suitable
for collaborative projects (as files are secure and easy to
share/collaborate, deleted files can be recovered up-to 30 days (in free
plan)). In Ubuntu 11.10 – dropbox (integration script with Nautilus)
has been included in official repository. So you can install it directly
from Software Center or type the command -
sudo apt-get install nautilus-dropbox
9. install gnome tweak tool
Gnome Tweak Tool is a utility for Gnome 3 desktop for tweaking the
desktop settings – and so it allows us to customize (windows
look/behavior, theme, Fonts etc) the desktop as we want. The
‘appearance’ settings doesn’t have much option now (as it used to be in
earlier version of Gnome) so Gnome Tweak Tool will do that.
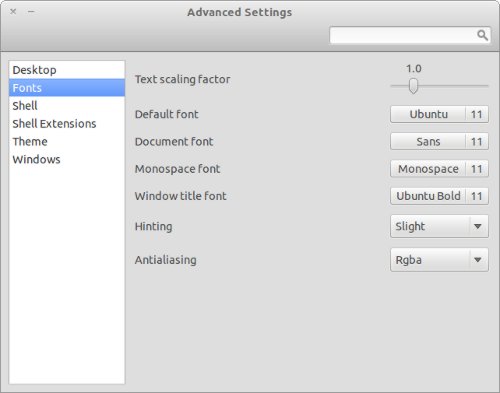
Tweaking Ubuntu 11.10
To install Gnome Tweak Tool open terminal and execute -
sudo apt-get install gnome-tweak-tool
10. Install alsa mixer
sudo apt-get install gnome-alsamixer
11. Try cool themes / icons
The default theme in Ubuntu isn’t that cool. Right? I don’t know
about you but many of us like to have cool/charming icons and themes. So
find out some great themes and icons, and enjoy Ubuntu 11.10.
Radiamentary Theme for Unity
Download Radiamentary Theme
To install themes in unity, Extract and Copy the theme file to
usr/share/themes ; then open Gnome Tweak Tool and select that theme
(GTK, icon, window etc). That’s All.
Additionally, Ubuntu software center is there – so just relax and
search for applications that you like, and find out your favorite
applications or try something new. Have Fun!


